The Savant Lighting TrueImage display allows you to view a virtual preview of your Smart Lighting control settings right from the App in real time, using photos of the actual lights taken in the App during the initial setup process.
TrueImage works by assigning two images to each of your Smart Lights or Light Groups; a
Lights On image and a
Lights Off image, which are taken in rapid succession right from the Savant Lighting TrueImage App and combined to form a single, variable image. Once configured, as you move the dimmer level slider from 0 to 100%, the image displayed will match the actual lighting level by adjusting the opacity of the overlaid Lights Off (0%,) and Lights On (100%) images. Changes to the selected color will be reflected in the TrueImage display as well.
This is a unique key feature of Savant Lighting, and offers unrivaled real time in-App feedback for lighting control. Capturing good quality images which accurately reflect the environment your Savant Smart Lights are placed in can make all the difference in creating a great user experience.
If you find that you are having difficulty capturing a TrueImage representation which feels true to life for any of your lights or light groups, this article will cover a few of the key elements which make for an excellent TrueImage experience, as well as some of the tools available in the App to help you get there.
TrueImage Setup
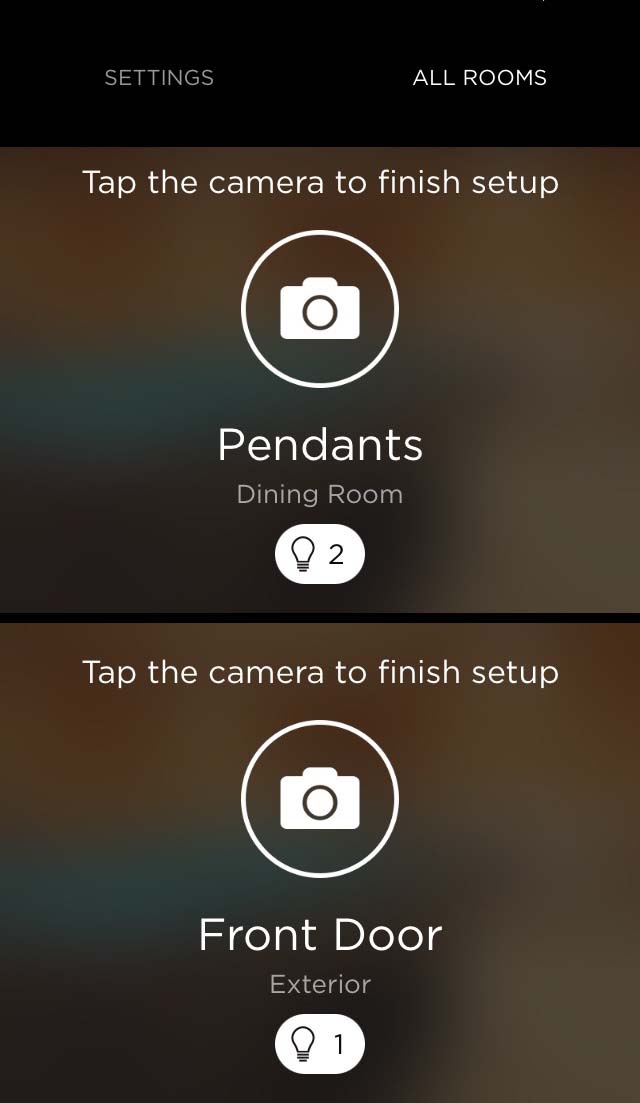
When you first complete initial setup of your Savant Smart Lights, or when you choose Reassign Imagery from the options menu for a light group, the All Rooms page (See Image to the right) will display the Camera icon above over the card for the selected group.
Tapping the Camera icon will bring you to the Camera Mode view seen below
|  |
| |
| |
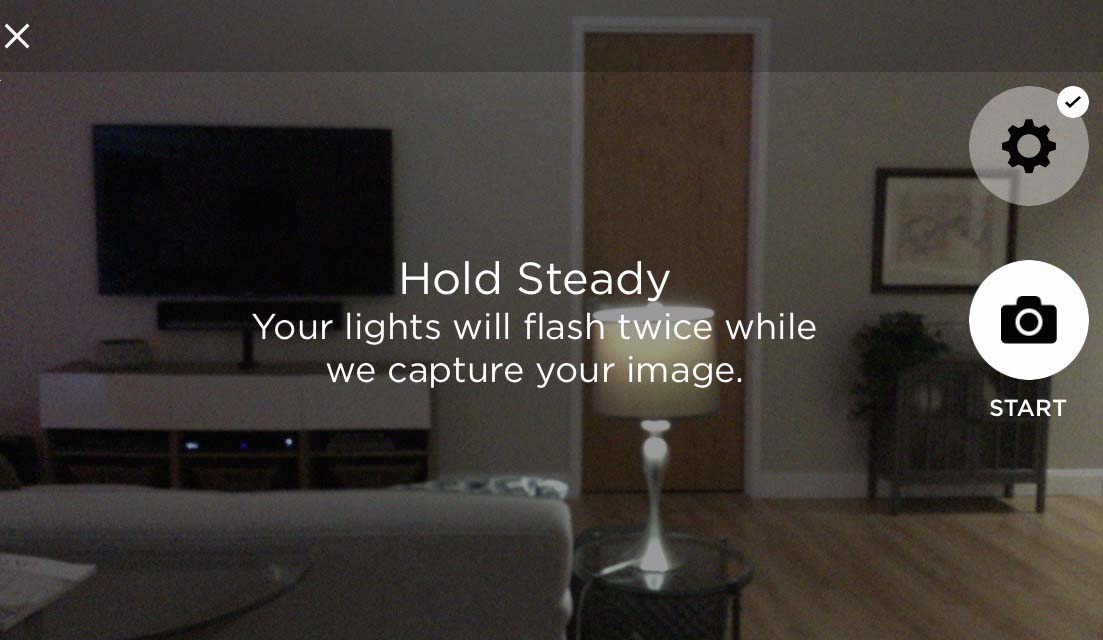
In Camera Mode, you will need to rotate your iPhone or iPad into landscape mode. There are three main options available:
• Tapping the Camera Icon labeled START at the middle right hand side will take two photos in rapid succession while also cycling your light or light group off and on, resulting in a Lights On and Lights Off image. These two images are the key elements of the TrueImage display.
• Tapping the small X in the upper left corner of the screen will bring you back out to the All Rooms view. Please note that if you back out from Camera Mode, the light group will remain unconfigured, as there will be no images associated with it.
• Tapping the Settings (gear) icon brings up the Exposure Settings view, which displays an exposure level slider down the right side of the screen.
|  |
| |
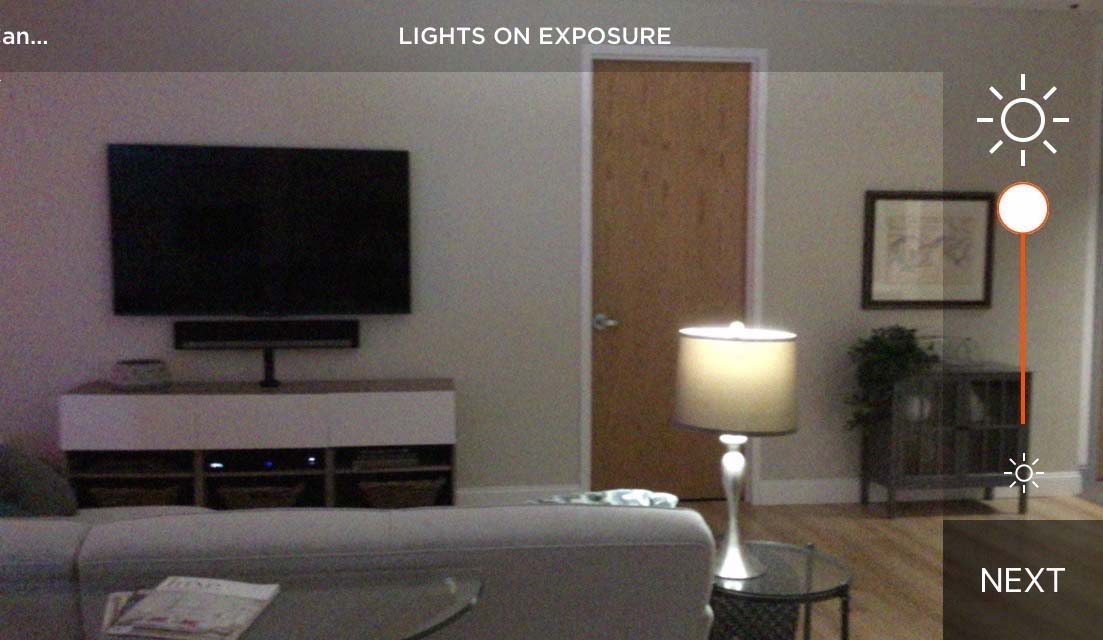
Exposure Settings Mode allows you to adjust for the particular environment and lighting conditions for both the Lights On and Lights Off images individually before they are taken, allowing for the best possible image quality and contrast between the Lights On and Lights Off images.
Adjusting the slider will increase or decrease the exposure level, and adjust the actual image in the Camera View accordingly. The exposure level which looks best and gives the most accurate representation will vary depending on a variety of factors, including visibility of other light sources, the color palette of the room, the presence of reflective surfaces, and the contrast between light and shadow in different areas of your shot.
It’s best to keep in mind that your Lights On image will represent your light group with its dimmer value at 100%, and Lights Off will represent it at 0%, so it’s best to maintain as much of a contrast between the two as possible. An underexposed Lights On image in combination with an overexposed Lights Off image will result in an underwhelming TrueImage display for the light group which doesn’t change much between a dimmer value of 0 and 100.
Once you have experimented a bit with the slider and found a level that feels right for the Lights On image, tap NEXT to set the value for the Lights Off Exposure.
| Lights On Exposure
Lights Off Exposure
 |
| |
High Contrast Images If the lights you are taking your TrueImage pictures for are the only light sources in the area, or if you are shooting in lighting conditions which otherwise make for high contrast between light and dark regions of your frame, getting a good image can sometimes be difficult. If you find that setting the exposure high enough to avoid losing detail in darker areas causes the lighter regions to look washed out or overexposed, and vice versa, consider trying some of the following:
- Try repositioning yourself and taking the shot from a different location. shooting from a different angle, or moving closer or further away from the lights you are capturing can make a difference.
- Try varying the level of ambient light in the shot by turning other light sources on or off, or re-taking the image at a different time of day to take advantage of natural lighting.
Lights On to Lights Off Range When Setting your contrast for the Lights On and Lights Off images in TrueImage, it can be helpful to keep in mind that the greater the difference between your Lights On and Lights Off images, the greater the visible change will be as you bring the dimmer level slider from 0% to 100% in the Savant Lighting App’s TrueImage preview screen.
- A Lights On image with the Exposure turned down too far combined with a Lights Off image with the exposure set too high, especially if there are other light sources or natural light in your image, will make for a TrueImage slider that doesn’t show much of a range between Lights On and Lights Off.
Other Tips for Improving Image Quality
- If there is a TV, monitor, or other screen in the frame of your TrueImage photo, it’s best to have the screen turned off when you take your pictures. Active screens can have a negative effect on your images.
- Positioning yourself so that you avoid having a direct view of any bare lightbulbs in your shot can be a good step to reduce light/dark contrast if you are having issues with getting the exposure set correctly.
- If you are shooting the TrueImage preview pics for a light group, and are having trouble getting all the lights in the group in one shot, it can help to just choose one or two lights to capture in your image and have them represent the whole group.
